Learn how to replace your shower cartridge with advice from Mr. Rooter Plumbing®.
|
If your showerhead or faucet drips, your water temperature fluctuates, or you’re having difficulty turning the shower handle, all signs point to a failing shower cartridge. This hidden component inside your shower valve controls water flow and temperature. When suddenly you’re no longer having showers with your ideal pressure and temperature, it can mean that you need to change your shower cartridge sooner rather than later.
If you want to learn how to replace a shower cartridge yourself, this step-by-step guide will walk you through the process.
What You Need to Replace a Shower Cartridge
Replacing shower hardware of any kind requires a range of different tools. A shower valve cartridge is no exception to the rule! You’ll need to acquire a few things to complete the job:
- A cartridge puller
- Pliers
- Screwdrivers
- A replacement shower cartridge
- Silicone grease
- Silicone caulk and a caulk gun
How to Remove a Shower Cartridge
Before you can replace your shower cartridge, you first need to remove the old one. Fortunately, this task is straightforward for those with a little DIY knowledge. Follow these steps below:
1. Turn Off the Water
Before you start the cartridge replacement process, turn off the water to your shower. Your water shut-off valve may be near your shower or in the basement. Alternatively, locate your main water shut-off valve and turn off the water supply to your entire house.
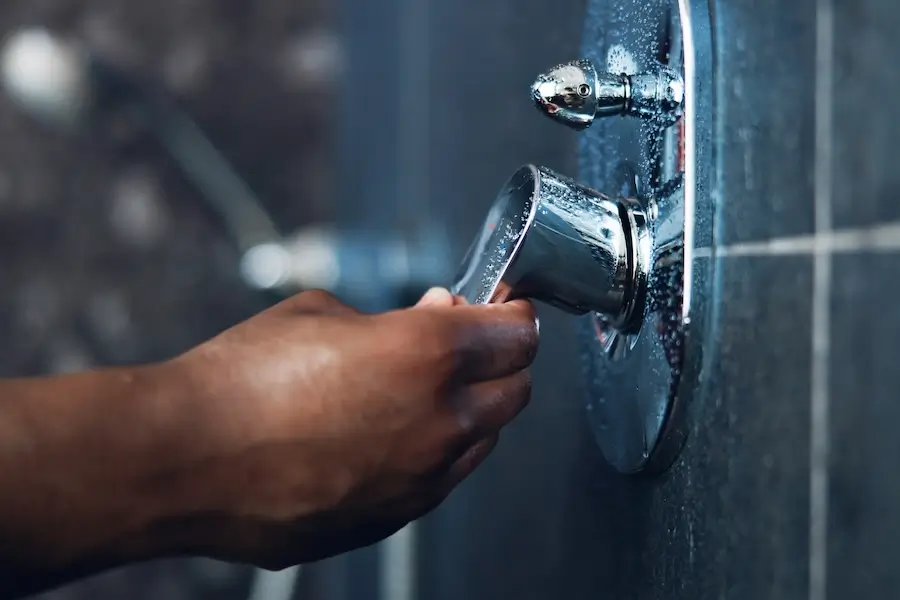
2. Access the Shower Cartridge
Shower cartridges are hidden out of sight behind your shower handle. Use a flathead screwdriver to pry off the escutcheon plate, or cover plate, to access yours. Once the cover plate is off, hold the handle and take out the screw located behind the cover plate. You can now access and remove the shower cartridge!
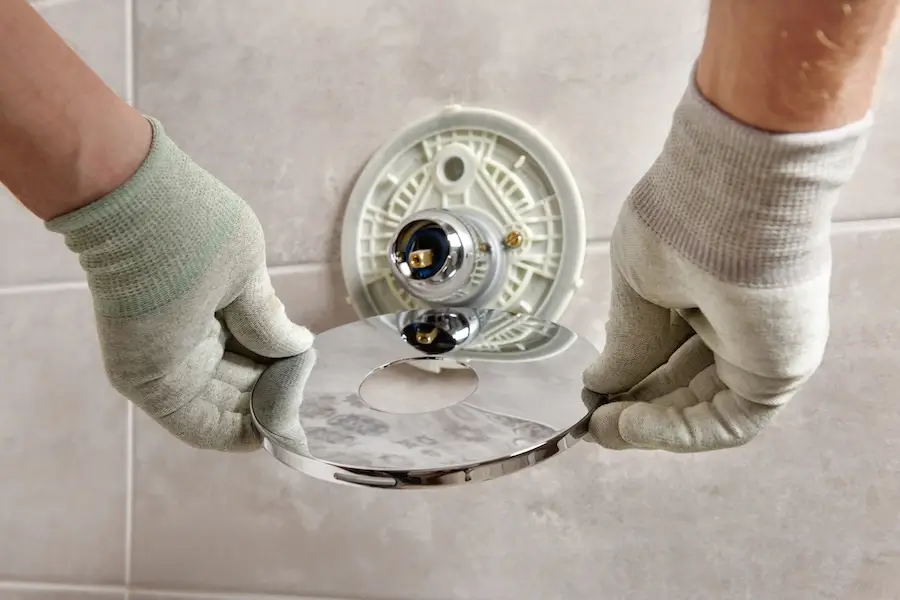
3. Remove the Cartridge
Learning how to install a shower cartridge means knowing how to remove one! Find the small clip holding the cartridge and pry it up. In some situations, you’ll need to use a cartridge removal tool to move the old cartridge back and forth until it’s free. Finally, remove the old cartridge using pliers.
4. Install a New Shower Cartridge
As you’re learning how to install a shower cartridge, you’ll be pleased to know that the final step of the process is straightforward. Get ready to put your new shower cartridge into place!
Apply silicone grease to the O-rings on your new shower cartridge. Insert the new cartridge into the valve body and push it into place. Install the retaining clip to keep it in place.
After the cartridge is in place, create a watertight seal by applying a bead of silicone caulk to the back of the escutcheon plate. Reattach it along with the shower handle. Turn the water back on and test out your shower!
How to Maintain Your Shower Cartridge
After learning how to change a shower cartridge, you may be surprised by how straightforward it can be. Still, that doesn’t mean you want to replace it more than necessary! Here are some helpful tips for maintaining your shower cartridge:
- Don’t use harsh chemicals in the shower
- Clean your shower often to avoid mineral buildup
- Check for leaks
- Take action quickly when you notice changes in water pressure and other issues.
Call Mr. Rooter Plumbing® for Shower Cartridge Replacement
Whether you need to replace a shower cartridge, a shower faucet, or any other plumbing fixture or fitting, the team at Mr. Rooter Plumbing® is here to help. We are your locally owned and operated plumbing team, available to take your call 24/7. Reach out and request a job estimate today.