Mr. Rooter Plumbing® provides guidance on replacing and installing a new toilet.
|
Whether you’re completing a bathroom remodel or have a broken toilet you need to replace, you’re likely wondering how to install a toilet. After all, changing out a toilet is not something you do every day, so it can require research to get it right.
Whether you’re installing a new toilet, need to know how to drain a toilet for removal, or are simply after removal tips, you’re in the right place. Read our how-to guide to learn how to install a new toilet.
Remove the Old Toilet
Whether you intend to reinstall an old toilet or install an entirely new one, you must first learn how to remove one! Toilet removal is a multi-step process that can require two people. Follow the steps below or enlist the services of a licensed and insured service professional to complete the job for you.
If you don’t have an old toilet to remove, skip ahead to step 5.
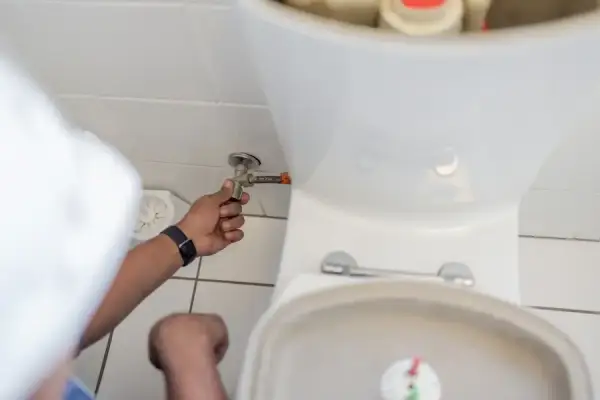
1. Turn Off the Water Supply
Turn off the water supply to the toilet at the shut-off valve. This is typically on the wall behind the toilet. Alternatively, turn off the main water supply to your home.
2. Empty the Toilet Tank and Bowl
To empty the tank and bowl, flush the toilet multiple times. You can also soak up residual water with a sponge or towel. Finally, disconnect the toilet connector tube at the shut-off valve. Be sure to have a towel or bucket ready to catch any water that may drip from the line once you disconnect it. You can then disconnect the connector tube at the toilet tank.
3. Remove the Toilet Tank
How you remove the toilet tank can depend on your toilet type. You must separate and remove the toilet tank if you have a two-piece toilet. Follow these steps:
- Place a towel on the ground, out of the way.
- Use a wrench to remove the mounting bolt nuts that attach the tank to the bowl. There usually is one on each side of the tank and one in the middle.
- Lift the tank away from the bowl and place it on the towel.
4. Remove the Toilet
Whether you have a one-piece or two-piece toilet, it’s time to remove the entire toilet from your bathroom!
If your toilet has trim caps over the floor bolts, remove these with a screwdriver. Use an adjustable wrench to remove the nuts on the floor bolts underneath. Otherwise, unscrew them by hand. If the nuts don’t budge, spray them with a bathroom-safe oil.
After removing the nuts, break the toilet wax ring seal that seals the toilet to the flange on the floor. You can do this by rocking it from side to side. Lay the toilet with the tank on the towel you set aside earlier.
Install the New Toilet
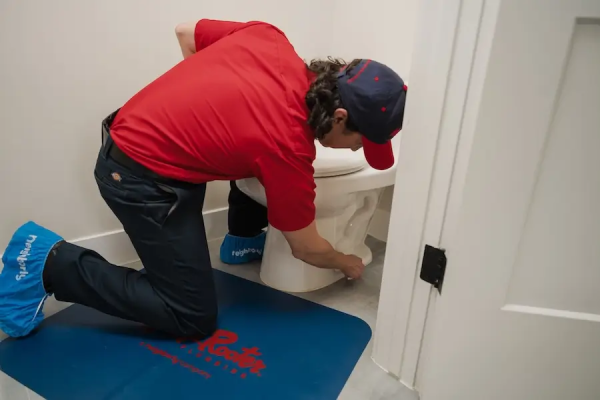
With your old toilet removed, it’s now time to install your new one! Here are some helpful steps to follow. Alternatively, contact your local trusted plumber for help.
5. Prepare for the New Toilet
Changing a toilet means creating an ideal floor surface for straightforward installation. Scrape away any leftover residue from the old toilet’s wax ring. If you’re reinstalling your current toilet, remove residue from the bottom.
Inspect the flange – the pipe fitting connecting your toilet to the floor and drain pipe. Replace it if it’s worn or damaged. Otherwise, clean it with a stiff wire brush. If you won’t be learning how to put in a new toilet right away, stuff a rag or towel into the drain hole to stop sewer gases from entering your home.
If your new toilet is ready to go, place the new wax ring onto the bottom of the toilet or directly onto the flange. You can then place your new or old toilet bowl onto the flange and ensure the bolt holes in the toilet bowl align with the holes in the flange. Set the seal by pressing down.
6. Bolt Your New Toilet in Place
With your toilet now sealed to the flange, it’s time to bolt it in place! Put a washer and nut on each bolt and tighten them evenly. Don’t overtighten the bolts, or you risk cracking the toilet bowl. If the bolts are too long, shorten them with a hacksaw.
7. Attach the Tank
If you have a two-piece toilet and the tank isn’t already attached, you’ll need to do this. Install the provided gasket onto the base of the flush valve and insert the bolts and washers through the inside of the tank.
Put the tank onto the bowl and ensure the bolts line up with the holes. Create a secure fit by tightening the tank bolts until the tank meets the bowl. Finally, attach the provided supply line to the piece of fill valve protruding from the bottom of the toilet tank to the supply valve through the floor or wall.
8. Install the Toilet Seat
If your toilet seat and lid aren’t pre-installed, installing them will be the final step of the toilet installation process! Choose a toilet seat that fits your exact model and follow the manufacturer’s instructions.
9. Test for Leaks
Congratulations, you now have a newly installed toilet! All that’s left to do is test it for leaks. Turn on the water shut-off valve and let the tank fill. Flush the toilet and inspect around the toilet base where the tank meets the bowl. If you suspect a leak, you can add a leak-detection dye to make spotting one easier.
Contact Mr. Rooter Plumbing® to Replace and Install a New Toilet
Not everyone has the time to learn how to replace a toilet – and that’s okay! Mr. Rooter Plumbing® is here to help. Contact our licensed and insured plumbing experts for professional toilet repairs, removal, replacement, and new installations. We are here to take your call 24/7.