If you are replacing a toilet or if you have discovered the toilet flange is damaged or broken, you may find you need to learn how to install a toilet flange. Occasionally, the existing flange will not work for your new toilet. Many homeowners discover when they try to replace it DIY-style that it is a difficult process. If you decide you aren’t comfortable completing the task on your own, you can always have an expert handle it for you. Either way, it’s helpful to familiarize yourself with the process.
Keep reading for the steps to flange replacement, including the tools you will need to get the job done right. With the correct tools and steps, you can expect the project to require a few hours of your time.
Tools to Install a Toilet Flange
To install correctly, you will need:
- New toilet flange
- Adjustable wrench
- Wax bowl
- Screwdriver
Steps for Toilet Flange Replacement
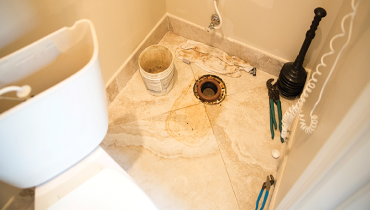
- Set up the project, keeping in mind that if you do not complete the operation swiftly and properly, serious water damage may occur. In order to prepare for the installation, you will first need to remove the old flange, any surrounding obstructions, and the wax ring so you have a smooth, clean surface to begin. Check out the steps for how to remove a toilet flange before you begin installation.
- Place the T bolts from your new toilet flange in the slots on either side of the toilet flange to get the placement right. Most new toilet flanges have slots that allow the bolts to be inserted from the top and will slide in-place. The threaded shafts should be sticking upward and will not pull through after final adjustment.
- Position the toilet flange by pressing it downward into the opening of the drain, using the T-bolts as points for positioning. The bolts should be equal distance from the back of the wall; this ensures the toilet’s tank is parallel to the wall. Achieving proper positioning is ideal prior to securing the flange.
- Bolt or screw the flange into the holes in the floor using the adjustable wrench or screwdriver to twist the fasteners snugly into place. The fasteners must not extend above the top of the toilet flange or they may prevent the toilet bowl from seating flush to the floor.
- Affix the wax bowl directly onto the flange to seal the toilet; this step prevents water and sewer gas leakage.
- Once the wax seal is in place, you are ready to fit the toilet onto the flange. Here are the steps for how to install a toilet.
Professional Toilet Flange Installation
Is figuring out how to install a toilet flange a project you would rather hand over to the pros? Don’t sweat it! It is actually a challenging task for even the most experienced DIYers. The good news is our local plumbing experts at Mr. Rooter are happy to handle the job for you. Call us to schedule an appointment or request an estimate online today to get a professional on the job right away.
If you’re remodeling your bathroom, you’ll have to make an important decision: Will you install a new shower door or hand a shower curtain? Like Mr. Rooter, Glass Doctor is part of Neighbourly’s community of home service providers. You can count on Glass Doctor for all of your glass needs – including custom shower doors and bath enclosures.