You start to wash the dishes and notice your water won’t heat up. You go to investigate the issue and find an extinguished pilot light. In a scenario like this, knowing how to light a water heater pilot light is crucial.
Mr. Rooter® Plumbing has the tips you need to get that flame going. We’ll walk you through the steps to reignite the pilot light and answer a few water heater-related questions along the way:
- Steps for Lighting a Water Heater Pilot Light
- Water Heater Pilot Light FAQs
Steps for Lighting a Water Heater Pilot Light
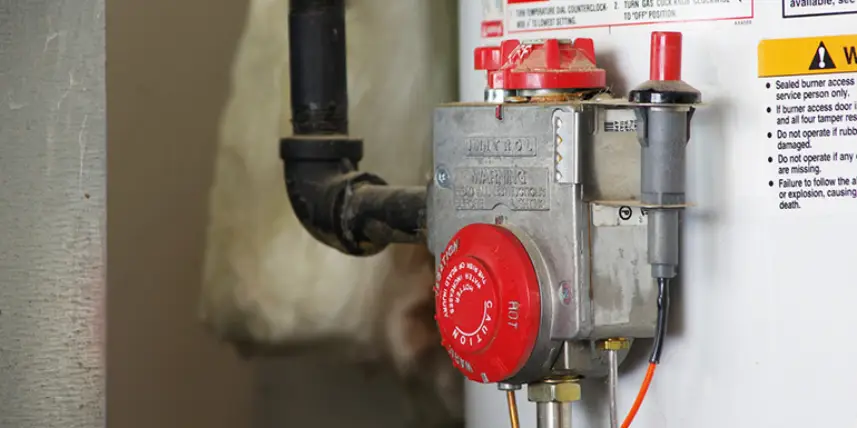
Before you do anything, read the instructions on your water heater. Most models have similar steps, but they may vary slightly. Most of the time, you’ll start by locating the gas shut-off valve on the unit. It’s usually located on the lower front portion of the tank and is clearly labeled. Turn that knob to “off” and wait five minutes for the gas to clear. Once you’re done waiting, follow these steps to reignite the pilot light:
- Open the door or cover over the pilot light access: This is typically located underneath the gas valve. Instead of a door, some water heaters have an open gap where you can see the pilot light burner.
- Use a flashlight or a headlamp to find the burner: Two small gas tubes lead to the burner. Make sure that the area where the burner is located is well-lit.
- Turn the gas knob to “Pilot,” press, and hold it down: This starts the flow of gas, allowing you to ignite the flame. Some heaters have a button labeled “pilot mode” instead. In this case, press and hold the pilot mode button.
- While holding the gas down, light the pilot: Some water heaters have a red or black igniting button, and others must be lit manually with a long lighter.
- When the flame ignites, continue to hold the gas knob or button down for a full minute: Release it slowly, and make sure the light is still lit.
- Turn the gas knob to “On”: Listen for the distinct “whump” or whooshing noise as the main burner ignites.
- Replace the cover: If your water heater has a cover, close it and enjoy hot water in your home once again.
An extinguished pilot light is usually a minor inconvenience, but if it happens multiple times, that indicates an issue with the water heater. A dirty or damaged thermocouple is the most common cause of repeated pilot outages.
Water Heater Pilot Light FAQs
What is a thermocouple?
In newer water heaters, a thermocouple is often called a flame sensor. You probably have a bent, dirty, or broken thermocouple if the pilot light continues to go out after following the above lighting steps.
If the thermocouple is bent and isn’t near the burner, you can simply shut off the gas, move the thermocouple over, and try lighting the pilot again. If that doesn’t work, you need to clean it.
To clean the thermocouple, shut off the water heater gas valve and the main gas line near the heater. Use a wrench to loosen the nuts attaching the thermocouple to the gas valve. With the nuts loose, remove the thermocouple from the pilot assembly; you may need a screwdriver for this.
Once the thermocouple is free, gently clean the tip of it using a microfiber cloth and steel wool. If this doesn’t solve the problem, you can get a new thermocouple at any hardware store for under $15.
Call Mr. Rooter Plumbing for Help with Water Heater Pilot Light Problems
Now that you know how to light a water heater pilot light, you should be able to restore hot water to your home with minimal difficulty. However, if your water heater is constantly breaking down, or you’re ready for a newer model, contact your local Mr. Rooter Plumbing to restore hot water to your household.
Our teams are ready and waiting to provide comprehensive water heater repair and installation services that meet your needs. Call Mr. Rooter Plumbing for experienced plumbers who adhere to our Done Right Promise™ and provide flexible scheduling for your convenience.